
Pipeline Inspection Checklist for Oil & Gas Operators
Pipeline inspection is one of those jobs that never ends in oil and gas operations. The work keeps pipelines safe and reliable. You can have the best welding and coatings, but if you skip inspection or cut corners, you’ll pay for it later with corrosion, leaks, or shutdowns. Below is a breakdown of how inspection is actually done in the field and what you should be checking every time.
According to PHMSA, hundreds of pipeline incidents happen every year. That’s why inspection programs have to be part of daily operations, not something you do once a year and forget.
Why Pipeline Inspections Are Important
Pipeline inspection finds the small problems before they turn into big ones. You’re looking for wall thinning, weld defects, corrosion cells, bad coating adhesion, or pressure fluctuations. Anything that could compromise the pipe’s pressure envelope. Most operators already know that corrosion doesn’t sleep. If you don’t track it, it will track you.
A good inspection program means fewer unplanned shutdowns, less product loss, and less paperwork from regulators.
Connection Between Inspection and Pre-Commissioning
Pipeline inspections feed straight into pre-commissioning. After construction, before you start moving product, there’s a phase where you make sure the line is clean, dry, and tight. That’s pre-commissioning. Inspection data tells you if you can move to hydrotesting, nitrogen testing, or drying. If your weld logs or pig runs show issues, you stop right there and fix them. No point drying a pipe that won’t hold pressure.
Pre-commissioning usually includes pigging, caliper gauging, hydrostatic testing procedure, nitrogen drying, and dewatering. It’s all about making sure the internal surface is clean and the line can hold its rated pressure. If you skip steps here, expect problems later when the line is live.
Types of Pipeline Inspections
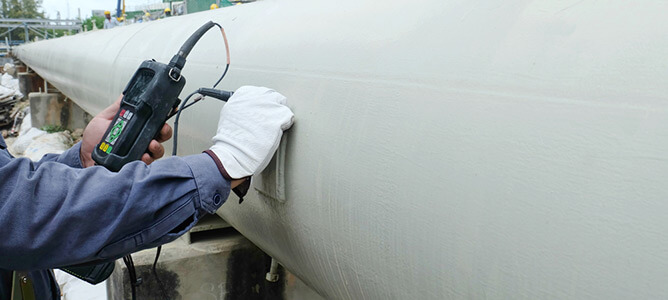
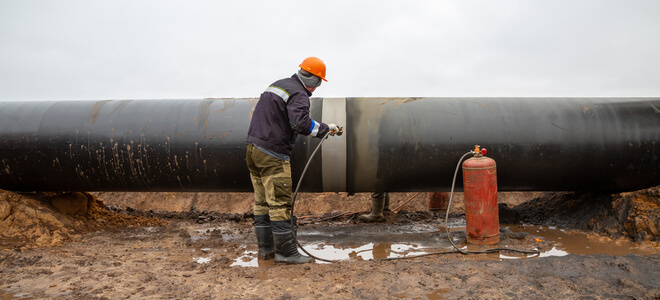
- Visual Inspection: Technicians walk or drive the line and look for external corrosion, dents, leaks, or coating failures. Simple but effective. Most problems start on the surface.
- Internal Inspection (ILI): Smart pigs or magnetic flux leakage (MFL) tools run inside the line. They find corrosion pits, wall loss, and dents. Data from these tools needs to be reviewed carefully; false positives happen, but so do missed defects if you rush.
- Hydrostatic Testing: You fill the line with water, pressurize it above operating level, and hold it. Any drop means a leak or weak spot. Always remove air pockets first or your readings will be off.
- Ultrasonic and Radiographic Testing: NDT methods for welds and girth joints. They pick up cracks, inclusions, and porosity. Radiography needs radiation safety permits…don’t skip those.
- Corrosion Monitoring: Permanent probes or coupons are used to track corrosion rates. You check readings during inspection cycles and adjust cathodic protection if values drift.
Pipeline Inspection Checklist
Below is a detailed checklist for oil and gas operators to make sure every part of the pipeline inspection process is complete:
1. Pre-Inspection Preparation
-
- Record pipeline ID, service type, grade, length, and installation year.
- Review documentation, including prior inspection and maintenance reports.
- Confirm safety and isolation procedures are in place for each pipeline segment.
- Confirm calibration for all gauges and sensors.
2. External Inspection
-
- Check for visible corrosion, leaks, and coating damage.
- Inspect pipeline supports, weld joints, flanges, and valves for alignment and integrity.
- Check valve functionality to confirm proper operation during emergencies.
- Look for soil erosion or vegetation changes that could indicate subsurface leaks.
3. Internal Inspection
-
- Use smart pigs or internal sensors to evaluate wall thickness and detect metal loss.
- Check for dents, gouges, or scale buildup.
- Assess internal coatings and any buildup of scale or debris.
4. Equipment and Component Evaluation
-
- Inspect connected components such as pumps, gauges, compressors, and fittings.
- Verify that associated equipment operates within safe parameters.
- Check for vibration, leaks, or abnormal noise during operation.
5. Pressure & Leak Testing
- Perform hydrostatic or pneumatic testing to ASME B31.4/B31.8 standards and pipeline safety guidelines.
- Record test pressure, duration, and ambient conditions.
- Identify leaks or pressure drops beyond acceptable limits.
6. Corrosion Protection Verification
-
- Inspect cathodic protection systems for proper current output.
- Measure potential differences along the pipeline.
- Evaluate coating and insulation condition and record any required maintenance.
7. Pipeline Cleaning and Drying
- Use pipeline cleaning pigs and foam swabs after hydrotesting.
- Blow down the line and dry to the required dew point (commonly -40°C).
- Moisture before nitrogen purging will cause condensation—avoid it.
8. Post-Inspection Documentation
-
- Compile all inspection data, photos, and test results.
- Include summaries of methods and equipment used during the inspection.
- Provide clear recommendations for corrective action or maintenance.
- Record signatures from inspectors and relevant supervisors.
- Update compliance and maintenance records for traceability.
Partner with NiGen for Reliable Industrial Support
After inspections, most lines need nitrogen purging, drying, or leak testing before startup. NiGen provides on-site nitrogen generation and testing units for these jobs. Our systems deliver dry, high-purity nitrogen used for purging, drying, and verifying system tightness. Less logistics, less waiting on cylinder deliveries.
Our pipeline maintenance company has been doing this work for decades. If you need help with pressure testing or nitrogen drying after inspection, give NiGen a call.