
Hydrotest Procedure for Pipelines (Pressure, Steps, and Requirements Explained)
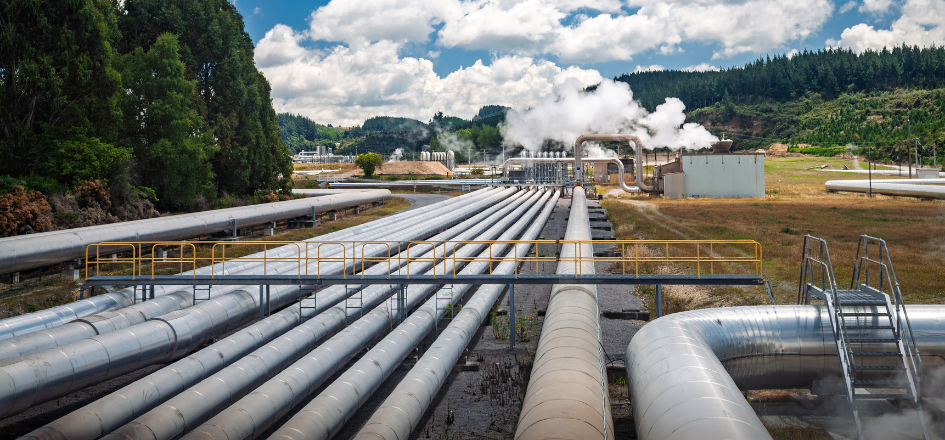
Pipeline integrity management is critical in oil and gas and industrial operations. A hydrotest is one of the most reliable verification methods used to ensure pipelines can safely handle operating pressures before commissioning or after repairs.
What is a Hydrotest?
A hydrotest (short for hydrostatic test) is a diagnostic procedure used to verify the structural integrity and leak-tightness of pressure vessels and pipelines. During the test, the system is filled with a liquid (usually water) and pressurized to a level significantly higher than its intended operating pressure.
Using a liquid rather than a gas makes the process inherently safer. Because liquids are virtually incompressible, they store far less energy and will not cause an explosion if the pipe fails during testing.
Difference Between Hydrotest and Hydrostatic Test
In most industrial settings, the terms hydrotest and hydrostatic test are sometimes used interchangeably. Both refer to the practice of using static water pressure to validate a system. Strictly speaking, “hydrostatic” refers to the fluid being at rest during the hold time, but both terms describe the same safety critical requirement.
Why Pipeline Hydrotesting is Required
Pipeline hydrotesting is performed to:
- Verify structural integrity before pipeline commissioning
- Confirm weld quality and joint integrity
- Detect leaks or weak points
- Ensure compliance with codes (ASME, API, DOT)
- Validate repairs or modifications
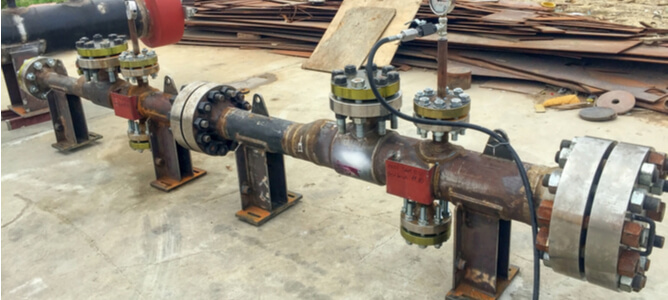
Pipeline Hydrotest Procedure (Step by Step)
A standard hydrotest procedure follows a structured sequence to ensure accuracy and safety.
1. Pre Test Preparation
Before filling the pipeline:
- Inspect pipeline construction and welds
- Install test blinds, valves, and gauges
- Ensure all vents and drains are accessible
- Verify instrumentation calibration
- Install pressure relief valves or safety devices to prevent over pressurization
Proper preparation and safety controls at this stage reduce risk and protect personnel and equipment during pressurization.
2. Filling the Pipeline
The pipeline is filled with the test medium. While water is the standard, corrosion inhibitors are often added if the water will remain in the pipe for an extended period.
- Fill slowly and vent all high points to remove trapped air (Pipeline Fill Volume Calculator)
- Use clean or treated water as required by spec
Proper air removal is critical for accurate pressure readings and safety.
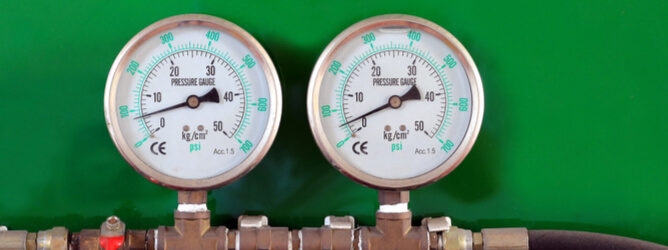
3. Pressurization
Using a high pressure pump, the pressure is gradually increased. This is usually done in stages, for example, increasing to 50%, then 75%, and finally 100% of the target hydrotest pressure.
These staged increments allow operators to check for leaks, confirm system integrity, and stabilize the pipeline before reaching full test pressure.
4. Stabilization
After reaching target pressure, allow the system to stabilize before the hold period. This accounts for temperature equalization and system settling.
5. Hold Period
Once the target pressure is reached, the system is isolated. The pressure is monitored for a set duration, typically 2 to 24 hours depending on the governing code (such as ASME B31.3 or B31.8).
Expert Advice: Keep an eye on the temperature. Ambient temperature changes can cause the water to expand or contract, which will change your pressure readings. It doesn’t always mean you have a leak.
6. Inspection and Depressurization
Inspectors monitor pressure for signs of leaks. If pressure remains stable (accounting for temperature), the test is considered successful.
- Tracer dyes or fluorescent additives may be used to help identify small or hard to detect leaks
- Any detected pipeline leaks must be repaired and the system retested until it passes
The system is then slowly depressurized and the water is drained.
- Water must often be filtered, treated, or disposed through approved systems depending on site regulations
7. Drying the Pipeline
After the water is drained, the pipeline must be dried immediately to prevent corrosion. Pipeline drying is typically performed using:
- Air drying systems (using high pressure compressors)
- Nitrogen purging (to displace oxygen and moisture)
- Desiccant air dryers (to reach specific dew point requirements)
Quick Field Checklist
Use this checklist as a final verification before executing or signing off on a hydrotest.
✓ Pipeline fully filled and all air removed
✓ All vents, drains, and blinds properly installed
✓ Pressure gauges calibrated and verified
✓ Relief valves installed and functioning
✓ Test equipment inspected and connected
✓ Water source confirmed and suitable for testing
✓ Disposal plan in place for test water
✓ Personnel briefed on safety procedures
Hydrotest Pressure and Requirements
Hydrotest pressure is typically set at 125% – 150% of the pipeline’s Maximum Allowable Working Pressure (MAWP).
Key Requirements for Compliance
- Calibration: All gauges and chart recorders must have current calibration certificates.
- Temperature monitoring: Because temperature changes affect fluid volume and pressure, ambient and pipe temperatures must be recorded throughout the hold period.
- Medium quality: The water used must be clean and free of debris that could damage valves or internal coatings.
Industry Standards
Pipeline hydrotesting must comply with industry standards such as:
- ASME B31.4 (liquid pipelines)
- ASME B31.8 (gas pipelines)
- API standards
- DOT regulations
NiGen Supports Pipeline Hydrotesting
NiGen provides the heavy duty equipment and technical expertise needed for successful pipeline hydrotesting and post-test commissioning. We specialize in:
- Nitrogen generation systems for drying and purging
- Air compressor systems for testing support
- Industrial air dryers for moisture removal
- Onsite equipment rentals for remote operations
Need reliable support for your next pipeline hydrotest? Our pipeline maintenance company delivers field proven equipment and expertise for pipeline testing, drying, and commissioning.
Contact our team today to discuss your project.